Creation of size table from garment measurements
On this page you can create new size tables using the flat garment measurements to perform the calculation.
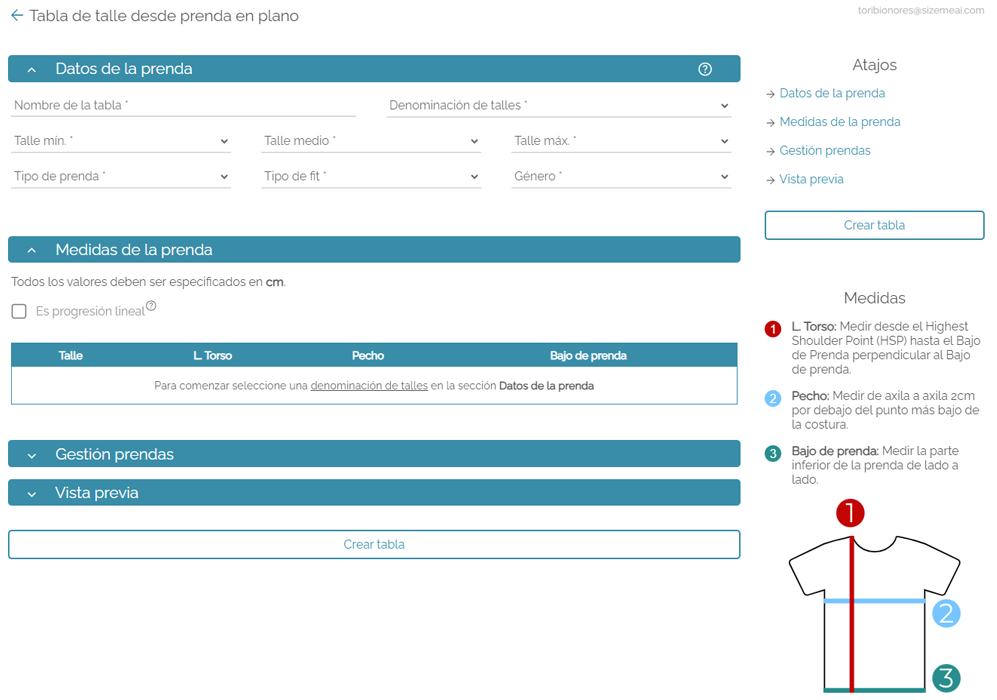
Right sidebar expand_more
On the right sidebar you can find quick access to each of the previously explained sections and the Create table button, followed by an explanation on how to measure each of the columns along with an explanatory drawing.
Table data expand_more
In it you must complete the following information: Name of the table, size designation, minimum size, average size, maximum size, type of garment, type of fit and gender for which the garment is intended.
Garment measurements expand_more
Here you will find, first of all, a checkbox type field where you must indicate whether the size measurements advance linearly, that is, the difference between each size is always the same (for example: S = 50cm, M = 52cm and L = 54cm has a linear progression of 2cm), or if there are variations in the differences of each size (for example: S = 50cm, M = 52cm and L = 56cm).
If you do not choose linear progression, a table will be shown with each of the sizes between the minimum size and the maximum size. The exact measurements of each column must be placed in it, which are determined by the type of garment chosen.
On the other hand, if you check the linear progression option, a table will be displayed that shows only two lines: progression and the chosen average size. In the first you must enter the difference in centimeters between size and size for each measurement, in the second you must enter the exact measurements of each column for the average size and the system will calculate the measurements for the other sizes. It is extremely important to highlight the importance of choosing the average size correctly in case of choosing a personalized size designation since, if not done, the calculations could be erroneous.
Add SKUs expand_more
Remember to add your clothes! Without them the button will not appear. You can add one by one on this screen, or upload a single column csv, where each row is a SKU.
Vista previa expand_more
Una vez completados todos los campos requeridos se mostrarán en esta sección dos pestañas donde podrás ver en cada una de ellas una tabla, en la primera pestaña se encuentra la tabla de talles generada a partir de los datos provistos, en la segunda pestaña se muestran las medidas de la prenda en plano para cada talle.
Mediante estas tablas podés verificar que todo sea correcto antes de crear la tabla definitivamente.
Remember to save the changes.
Remember to refresh the integration.
For the changes made to size tables and garments to have an effect on your integration, you need to refresh it. Although this process is carried out periodically automatically, you have the possibility of doing it at any time from the page Manage my integration.